Registering Models, Datasets, and Predictions
Contextual information (e.g., the name of a label column in a dataset) is necessary to compute many of the statistical measures powering the Robust Intelligence testing suite.
Registries provide you with a way to store this context alongside your models, datasets, and prediction files. Once a data object is registered, Robust Intelligence will reference the artifact by its unique ID, which can be reused for repeated references to the data object (e.g., a training set used in Stress Testing.
Registration can be performed with a single Python SDK call, as illustrated below.
Once a model, dataset, or prediction set has been registered with a Robust Intelligence instance, that data object is available for selection in the appropriate drop-down selectors during project configuration for a stress test.
Note: Once you have registered your data and initiated stress testing, the data is cached according to the pre-established configuration settings. It’s crucial to understand that the Robust Intelligence systems maintain a reference to the original data location specified during the setup.
If any changes are made to the data at this source location after caching, these modifications will not be recognized or reflected in subsequent stress tests. This is because the systems are designed to work with the state of data at the point of caching and do not dynamically update to account for any changes at the source location.
To ensure the integrity and accuracy of your stress tests, avoid making changes to the data at the referenced locations after the initial setup. If modifications are necessary, you’ll need to re-register your data and reconfigure your stress testing settings accordingly.
This includes files, Hugging Face integrations, Databricks integrations, and any other sources referenced in your settings.
Get started by retrieving your project
Before you begin to register a model, make sure you’ve installed the Python SDK and initialized your client:
from rime_sdk import Client
client = Client(domain=<CLUSTER_URL>, api_key=<API_KEY>)
and get your project object where you want to register your model, dataset, or prediction set by first grabbing your project ID and then use the SDK:
project = client.get_project(project_id=<PROJECT_ID>)
You may also create a new project using the SDK:
project = client.create_project(name="<PROJECT_NAME>", description="<DESCRIPTION>", model_task="MODEL_TASK_BINARY_CLASSIFICATION")
Note
See the Python SDK documentation for more details.
Once you have your project, proceed to Registering a Model, below.
Registering a Model Using the SDK
Assuming the Robust Intelligence SDK is installed and available for use and that the relevant data objects have been uploaded to the Robust Intelligence instance, you can register a model using the following procedure. See the Python SDK documentation for full details on the SDK calls used in this procedure.
Register your model with a model config or with a path to a model artifact.
Example of registering a Hugging Face model
# Get your model config
model_id = project.register_model(
    name="<NAME>",
    model_config={
        "hugging_face": {
            "model_uri": URI,
            "kwargs": {
                "tokenizer_uri": TOKENIZER_URI,
                "class_map": MAP,
                "ignore_class_names": True,
            },
        },
    },
)
For more on model configuration, check out the model configuration documentation.
Registering a model with a path to a model artifact
model_id = project.register_model_from_path(name=<NAME>, remote_path=<MODEL_PATH>)
Note
Registering your model will run validation on it to ensure it works with Robust Intelligence’s systems. This may take a few seconds.
See more about validation statuses here
Passing secrets to the model
If access credentials are required by your model at runtime, you can pass them in as model endpoint integration. A model endpoint integration specifies secrets as key-value pairs, that are made available to the model during runtime, when it is making a prediction.
To do so, you would need to first create an integration in the Robust
Intelligence UI and specify the secrets there. Then, the integration’s
uuid must be passed as the model_endpoint_integration_id parameter
when registering the model. The model’s
predict interface
would then need to specify an integration_dict parameter, which
would receive the secrets as key-value pairs.
model_id = project.register_model(
    name="<NAME>",
    model_config={
        "model_path": {
            "path": "path/to/model.py"
        }
    },
    model_endpoint_integration_id="<Integration UUID>",
)
Check out the SDK documentation for more on registering a model.
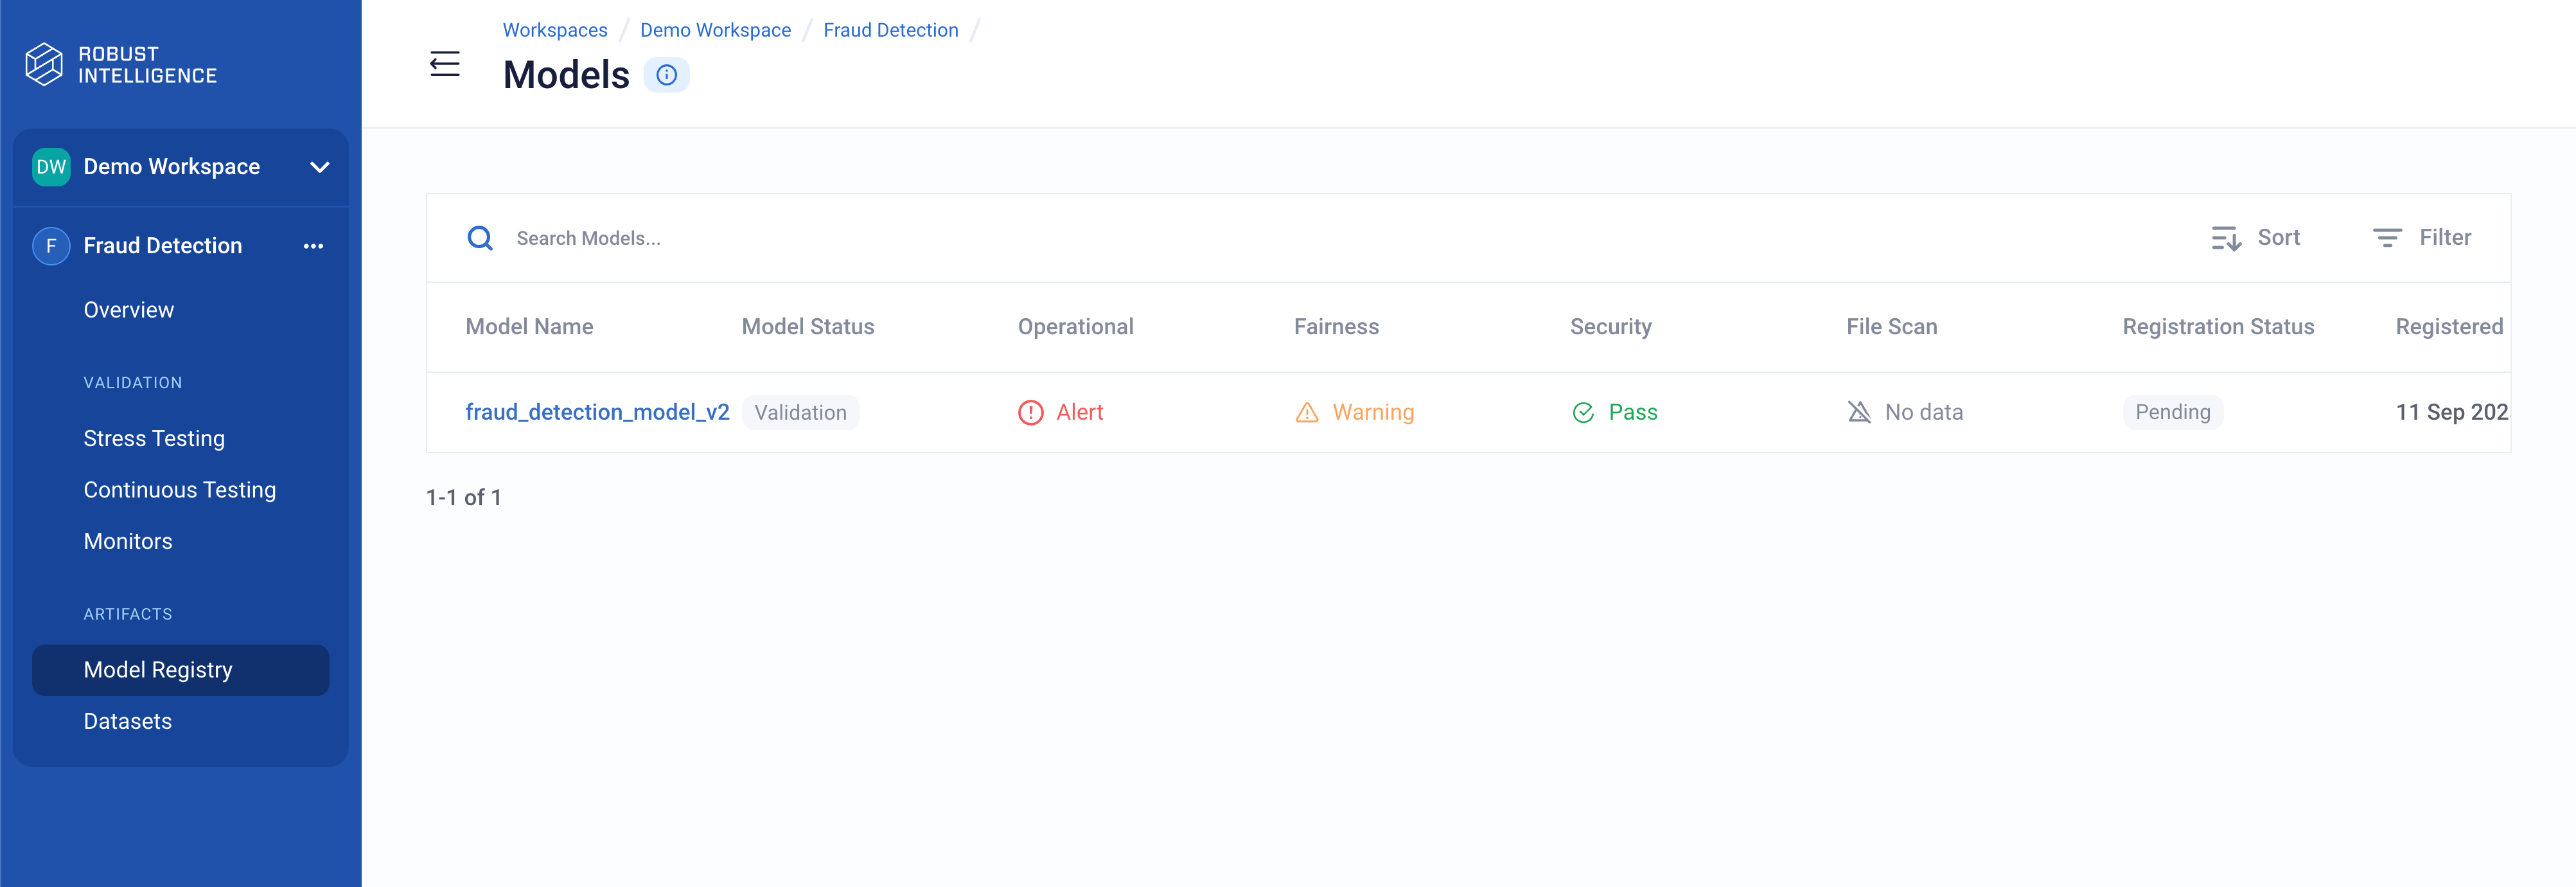
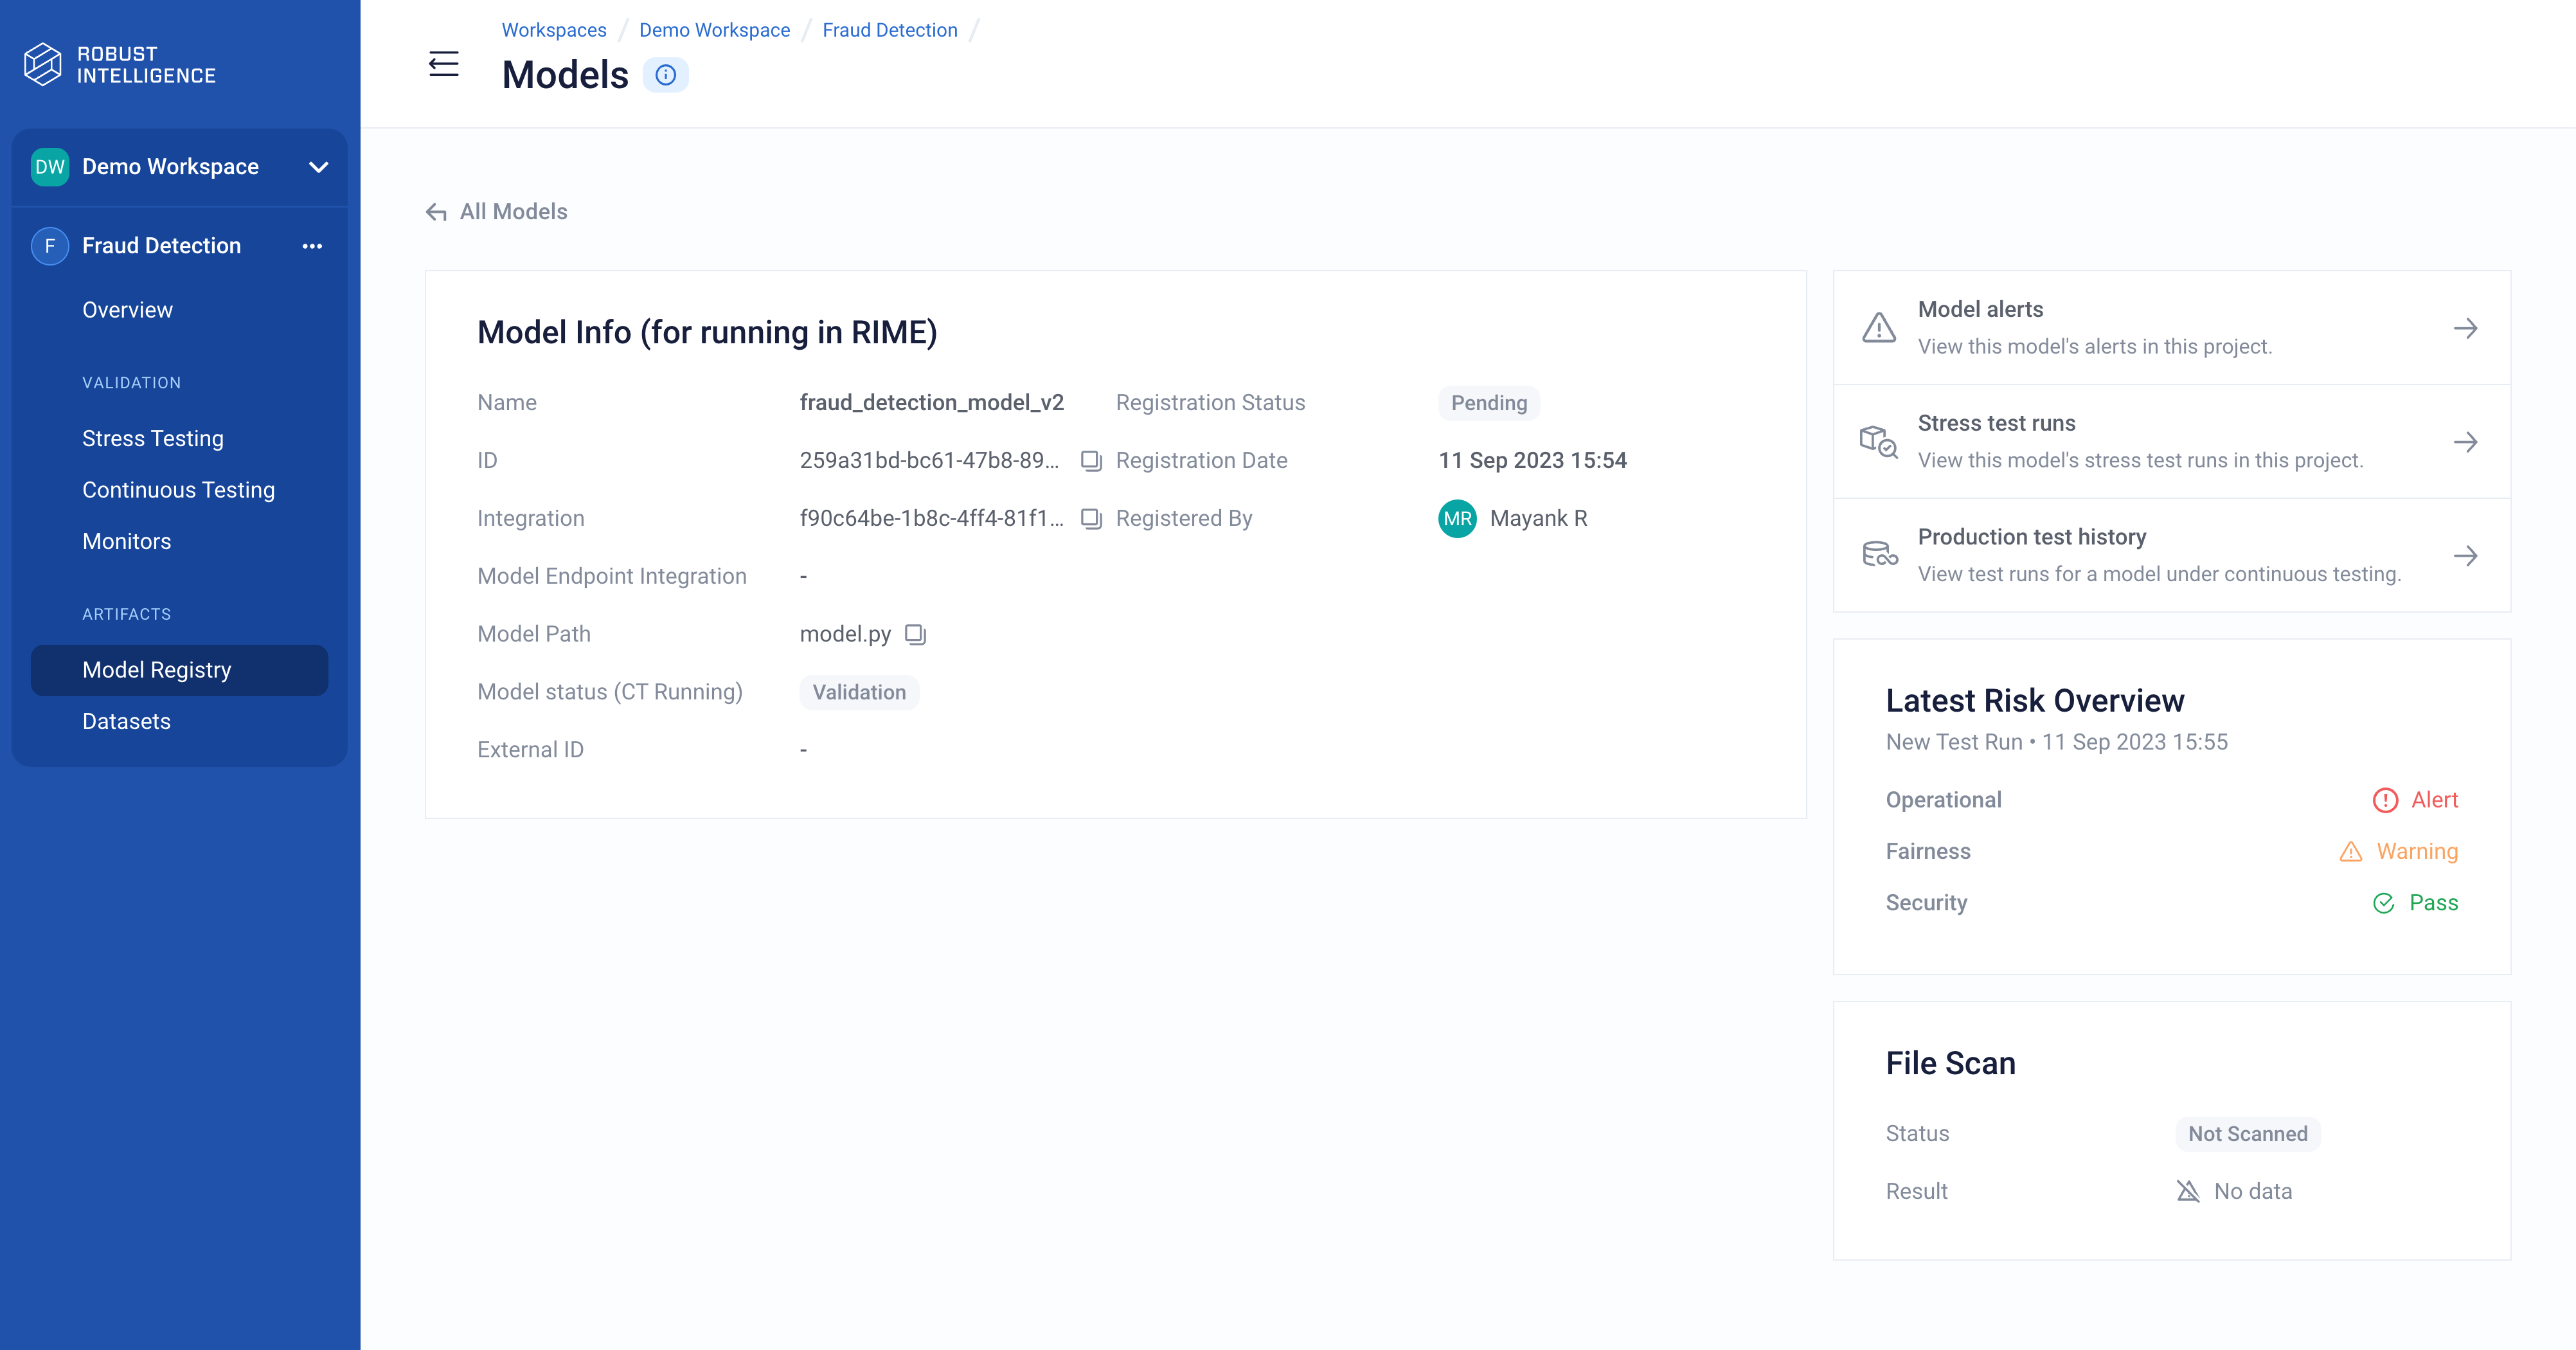
View registered models in Web UI
All registered models along with their metadata and latest risk status can be seen on the Robust Intelligence web UI.
Sign in to a Robust Intelligence instance or click Workspaces in the right navigation panel.
In the Workspaces page, click the name of your workspace.
From the list of projects, click on the name of your project.
In the left navigation panel, click on Model Registry.
Here, you should be able to see a list of all models that have been registered in this project.
Clicking on any model row will take you to the Model Info panel with more details about the specific model.
Learn more about the Model Info panel.
Registering a Dataset Using the SDK
Register your dataset with a dataset configuration.
data_config = {
    "connection_info": {
        "data_file": {
            "path": "<PATH_TO_DATA_FILE>"
        }
    },
    "data_params": {
        "label_col": "is_fraud",
        "timestamp_col": "timestamp"
    },
}
dataset_id = project.register_dataset(
    name="<DATASET_NAME>",
    data_config=data_config
)
For more on dataset configuration, check out the dataset configuration documentation.
Note
Registering a dataset will run validation on it to ensure it works with Robust Intelligence’s systems. This may take a few seconds. Validation is currently not supported for JSON files and custom data loaders.
See more about validation statuses here.
Check out the SDK documentation for more on registering a dataset.
Registering Predictions Using the SDK
Grab your dataset and model IDs or register new ones
dataset_id = project.register_dataset(
    name="<DATASET_NAME>",
    data_config=<DATASET_CONFIG>
)

model_id = project.register_model(
    name="<MODEL_NAME>",
    model_config=<MODEL_CONFIG>
)
See above for more information on registering a dataset or model.
Register your predictions with a predictions configuration
prediction_config={
    "connection_info": {
        "data_file": {
            "path": "<PATH_TO_DATA_FILE>"
        }
    },
    "pred_params": {
        "pred_col": "<PREDICTION_COLUMN_NAME>",
    },
}

predictions_id = project.register_predictions(
    dataset_id=dataset_id,
    model_id=model_id,
    pred_config=prediction_config
)
Note
Registering predictions will run validation on it to ensure it works with Robust Intelligence’s systems. This may take a few seconds. Validation is currently not supported for JSON files and custom data loaders.
See more about validation statuses here.
Check out the SDK documentation for more on registering predictions.
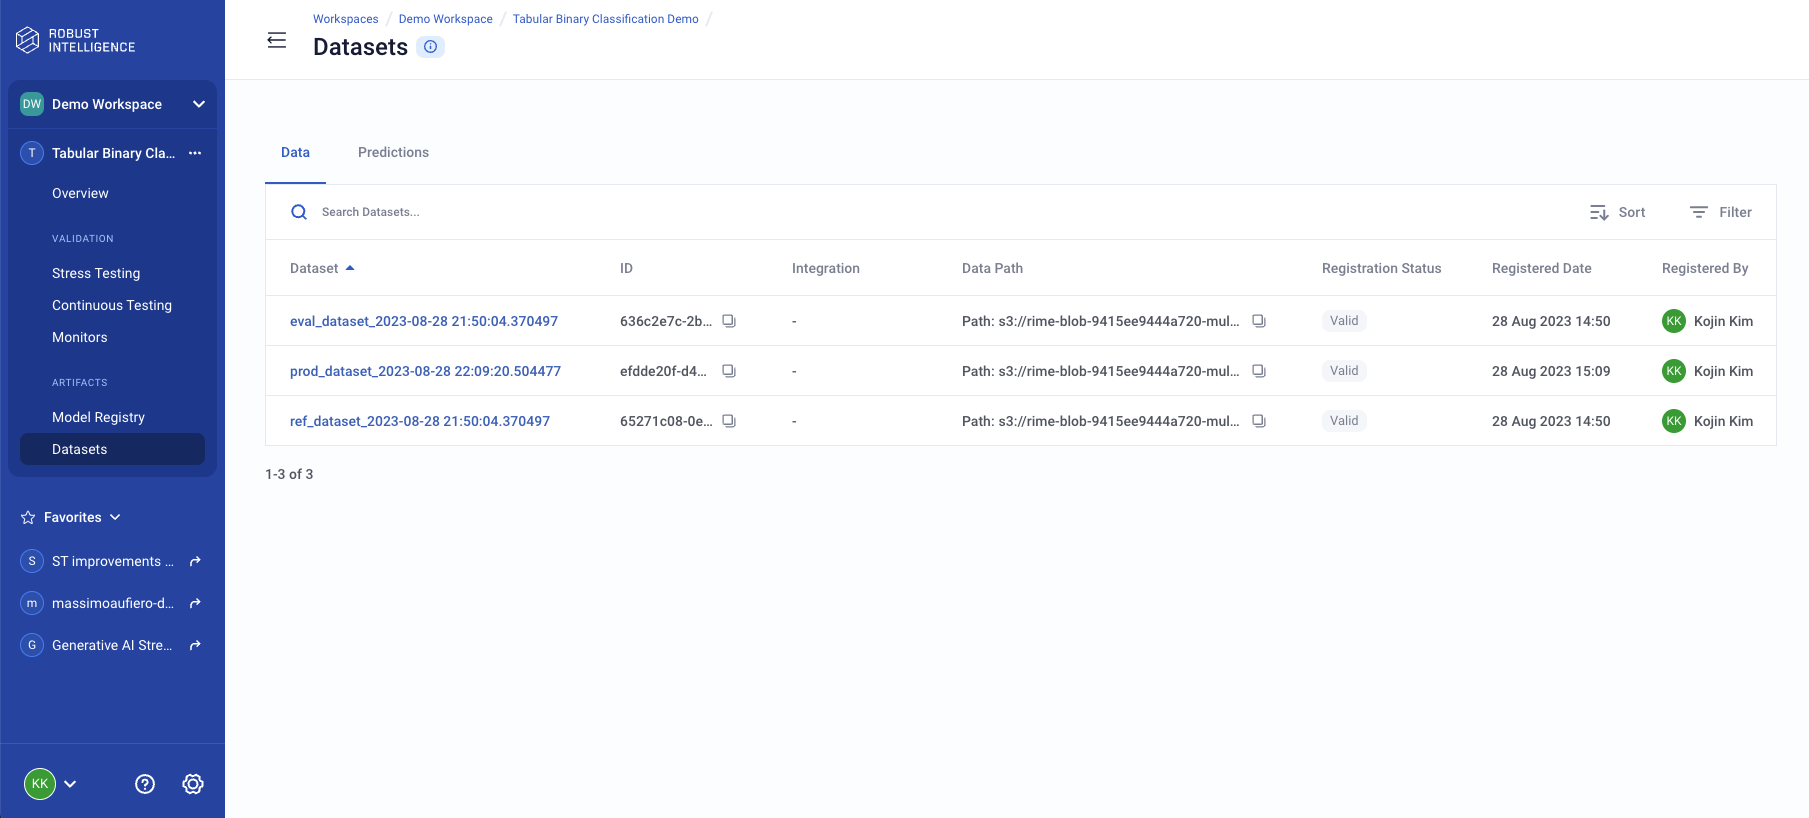
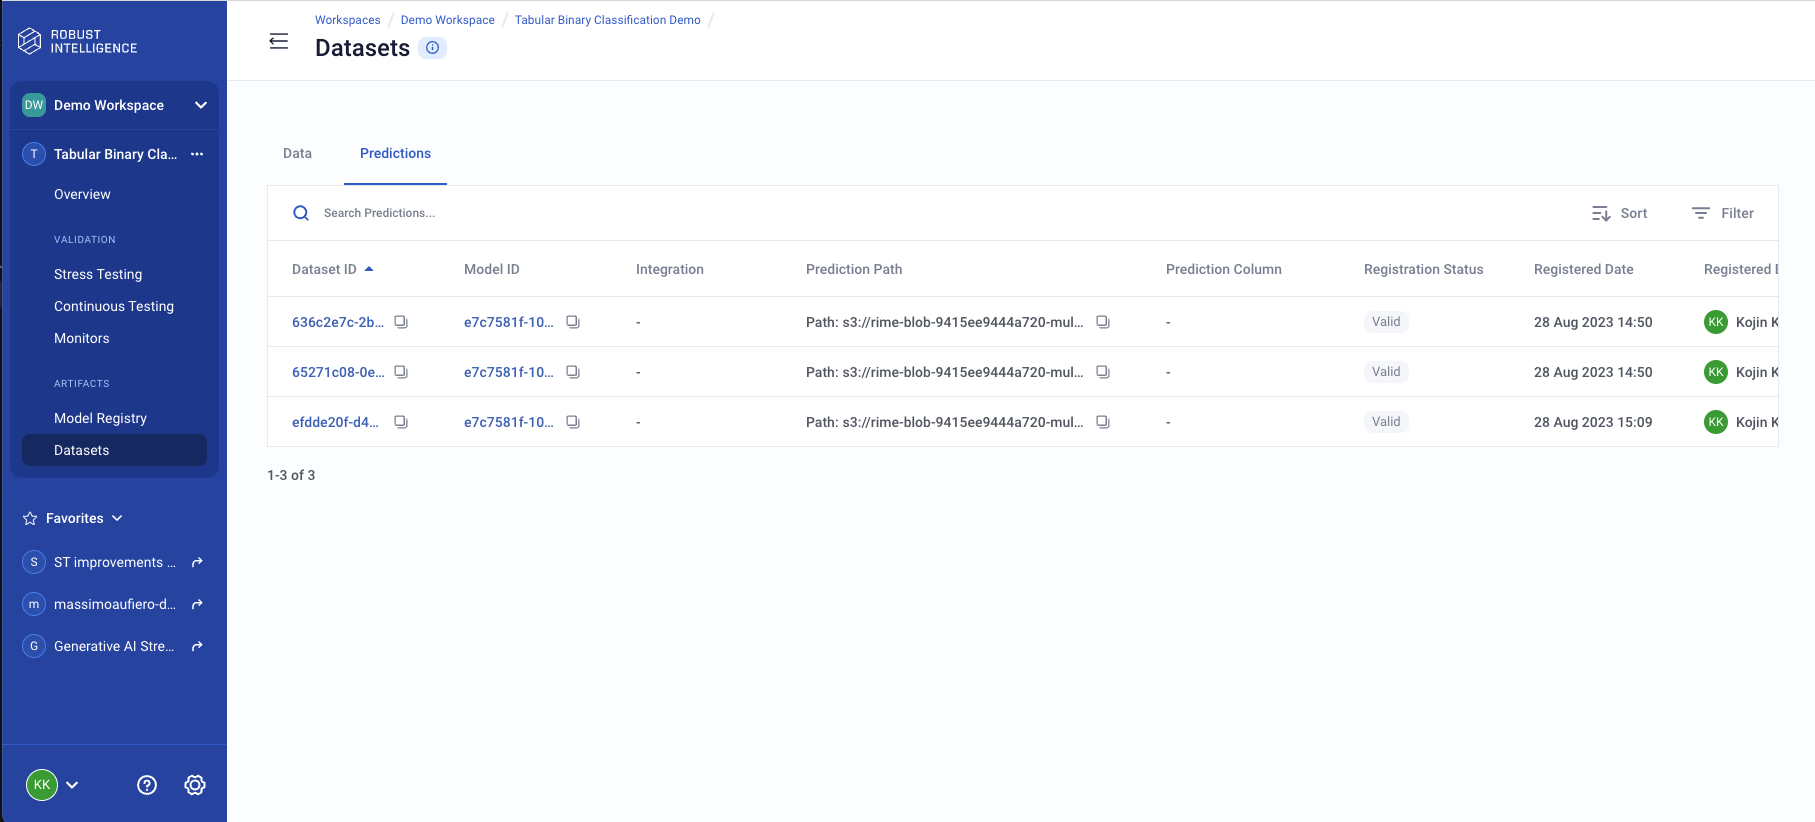
View registered datasets and predictions in Web UI
All registered datasets and predictions along with their metadata can be seen on the Robust Intelligence web UI.
Sign in to a Robust Intelligence instance or click Workspaces in the right navigation panel.
In the Workspaces page, click the name of your workspace.
From the list of projects, click on the name of your project.
In the left navigation panel, click on Datasets.
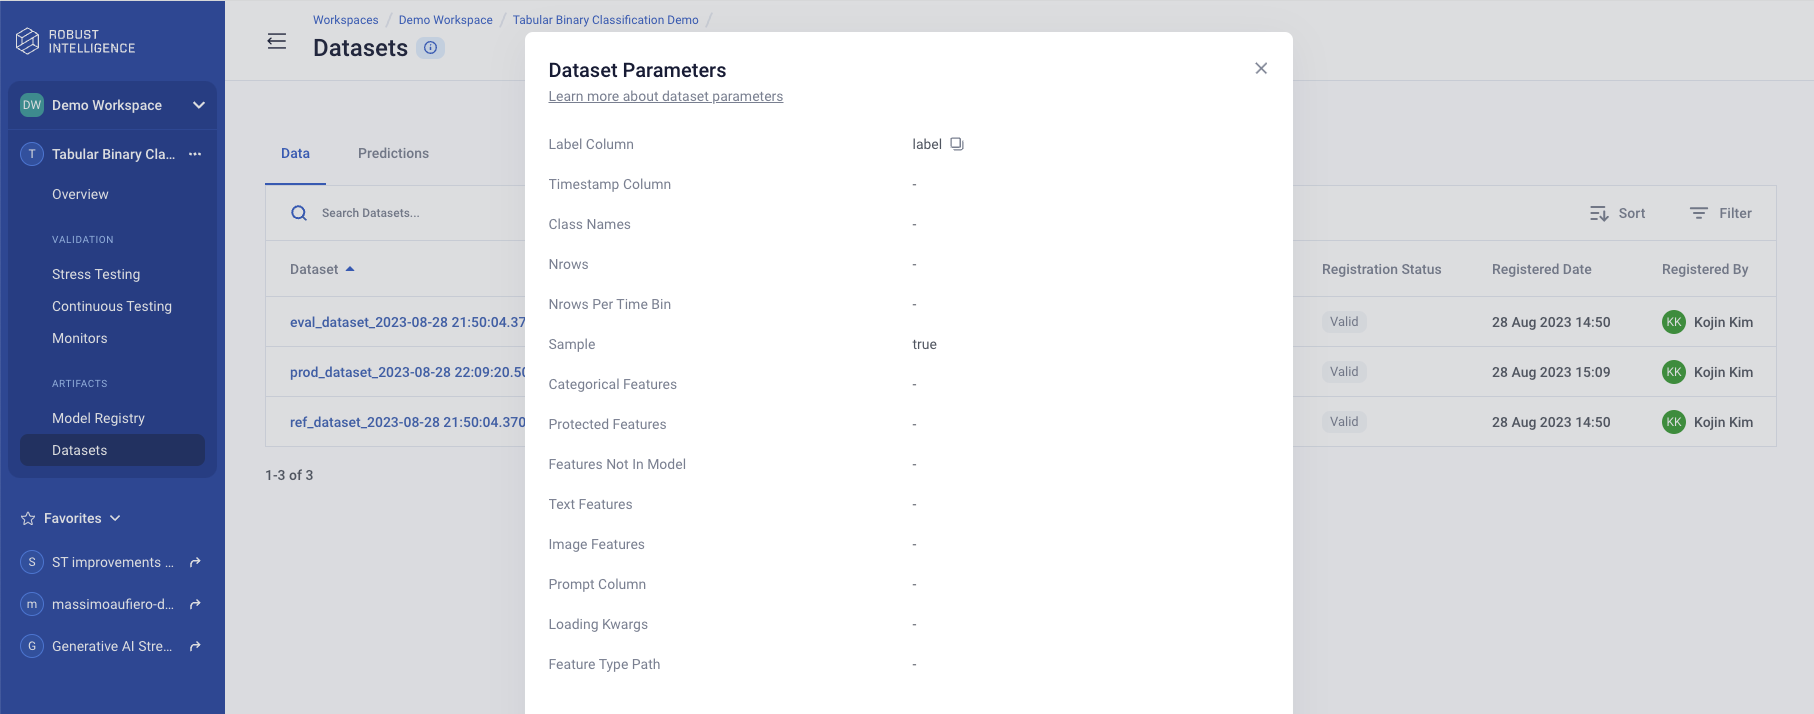
Here, you should be able to see a list of all datasets and predictions that have been registered in this project.
Clicking on any dataset row will open up a modal with dataset parameters details.